
A Chicken Plucker
(click on images to get an expanded view)
 I have been asked to show and explain the construction of my chicken plucker. This was a fun project and the results are fanastic. You can buy a commercial one already made out of stainless steel. If you really want one and have about $1,500 you don't need, go for it.
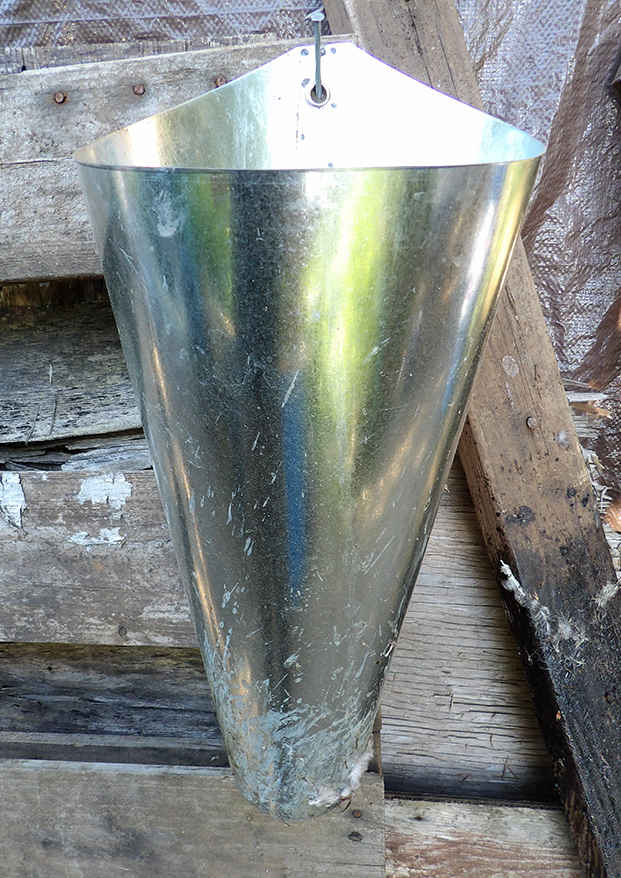
First, let me tell you, if you are raising chickens for your table, these pluckers are incredible. It can pluck a chicken clean in 10 seconds. I hated to hand pluck a chicken. Using my plucker, I have prepared 20 roosters in about 30 minutes. The soaking/scalding the bird in hot water takes10 times longer than to pluck it.
My adventure began by searching for a something that would make it easier and faster. There are dozens of videos on Youtube showing some type of mechanical chicken plucker in action. I spent some watching them. People have used many different ways to build a chicken plucker. This is not rocket science. If you are serious about building one view some of videos on Youtube.
The way this works is you prepare the chicken. No need to cut the head off. I guess you could if you wanted to do that. I use a killing cone and just split on each side of the neck and let it bleed out. These cones are available in the usual places, Ebay, Amazon, etc. Once the chicken is ready go, you need to scald the bird. You need a tank or pot with hot water at 160 degrees. I use a 2x4 to keep the bird submerge, they like to float to the top. 40-60 seconds is enough time. Drop the bird into the plucker and turn on the motor. I use a hose to spray the bird while it is spinning around in the barrel. Some people have installed a plastic ring around the top of the tank and it is hooked to a water source in order to spray the bird while spinning. I was going to try to that but the plucking is so fast, 10 seconds, I don't feel like wasting the time to get real fancy.
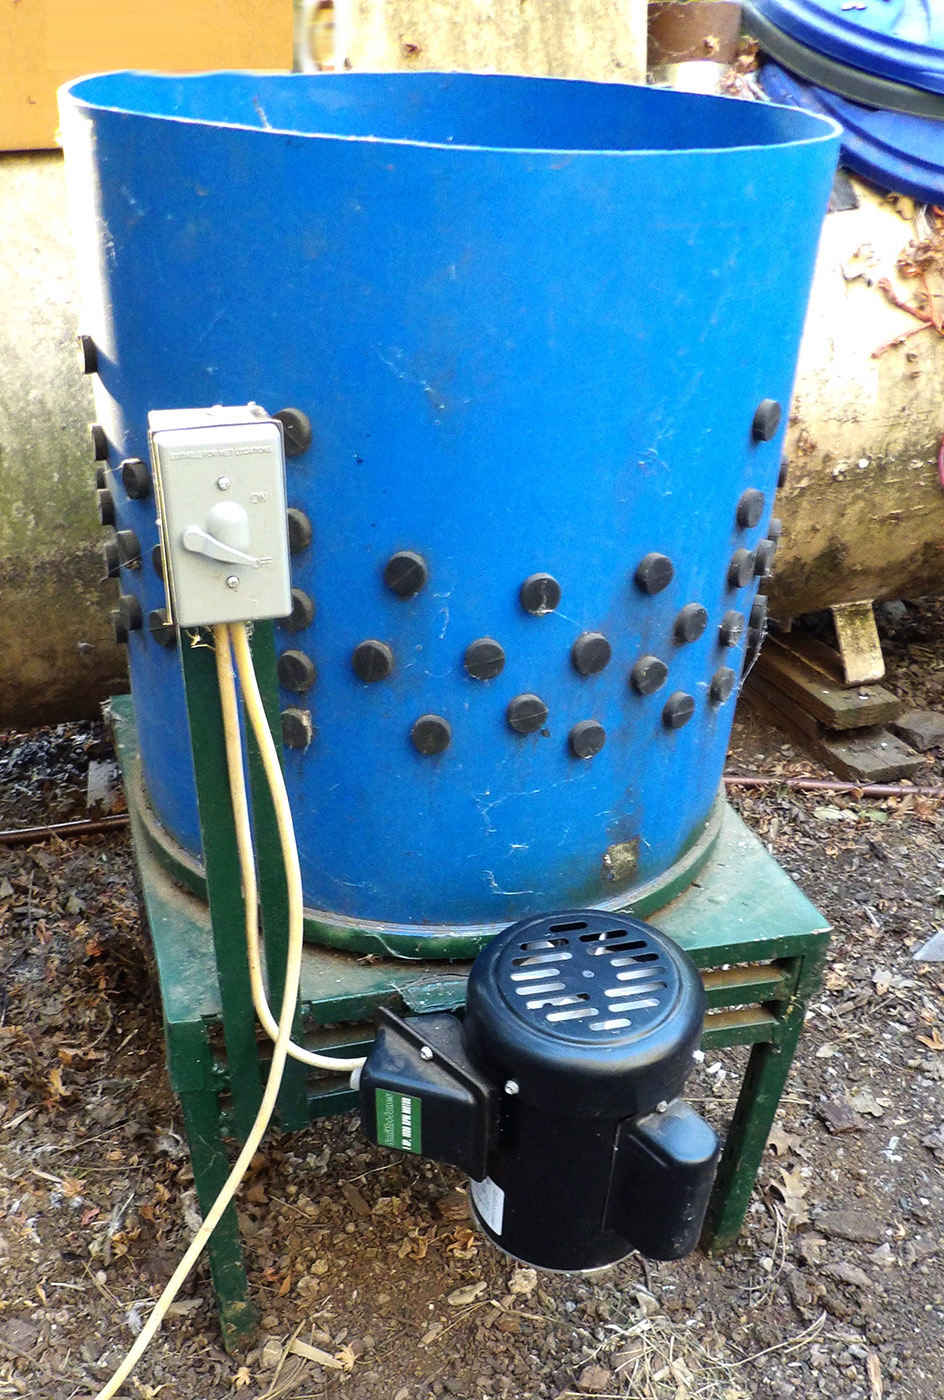
So, I decided to build one for myself. I had a few of the "blue barrels" on hand. I can't speak for you area, but around here Sacramento there are several companies that sell this type of barrel. I know because, my next project is a rain water storage system, and have been looking for more barrels. So, I took a power saw and cut the barrel down, I cut my barrel down to 25 inches.
 You are going to need a huge aluminum round plate for the spinning action. I found one on Ebay that would just fit into the barrel. I paid $90.00 for it at the time and some shipping. I don't know if they are still available but I assume they are still for sale. The plate came predrilled for the rubber fingers.
From Ebay, I ordered the rubber fingers. I believe I paid $65.00 plus shipping for 150 fingers. My next problem was figuring out where or how up to drill the holes for the rubber fingers. I watch several videos and learn that the plate needed to be up from the bottom to allow for the exit for the feathers. I could not find any information on how high and how big the holes. I just estimated what was needed.
So I had the plate which was predrilled for the fingers. Next, I pulled out my drill. Loaded up a 3/4" drill bit and prepared to start drilling some holes. I have to tell you, it took a little work to pull the fingers through the holes. Where do you drill the holes? I started about 8.5 inches up from the bottom. I tried to follow some pattern as best I could. You can see from the picture, how I did it. I believe just about any pattern you created will work just fine.
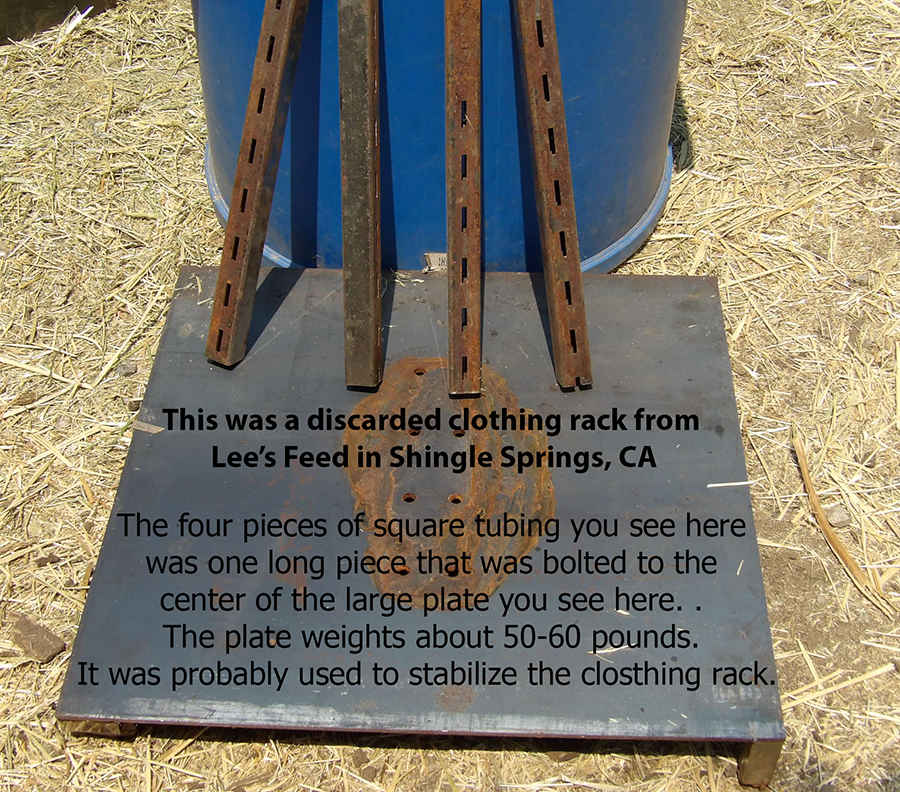
I use some olive oil to help pull the fingers through the holes. Even then I worked up quite a sweat and use some off-color remarks while doing so. I believe I did it in stages over 3 or 4 days. However, I did get them all in and was quite happy with the results. At this point I had invested $90 for the plate and $65 for the rubber fingers. My next thing was to build a stand to hold the barrel and the motor. I was in luck and picked up a discard clothing rack from a local feed store, Lee's Feed in Shingle Springs on Motherlode Drive. It had a perfect base of 24" x 24". The base was solid steel about 1/4" thick. It was heavy as not to tip over with unbalanced clothes hanging on it. I cut the long square tubing that was used to hold the clothes into 4 pieces that would be become the legs for the base.
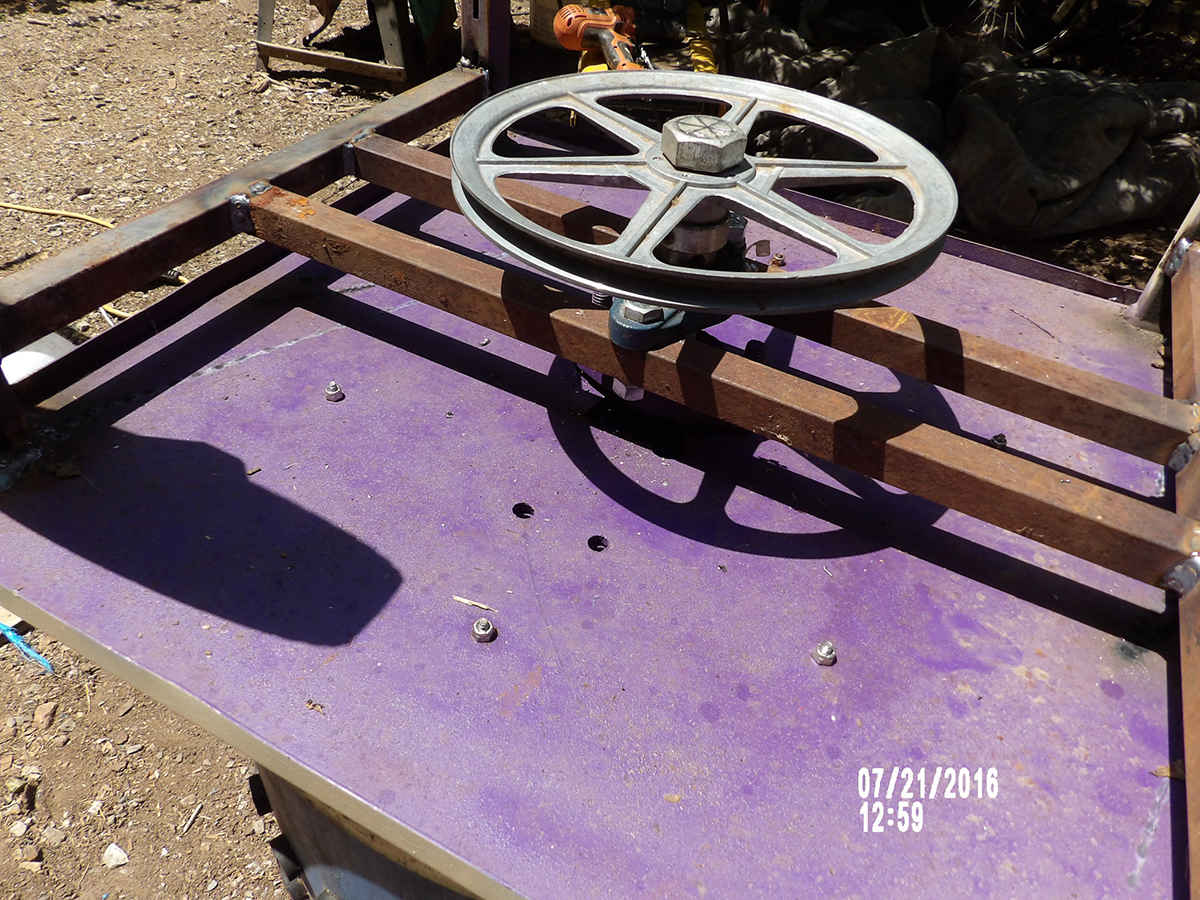 Now, I pulled out my welding and began welding up the legs and frame to hold the disc and the motor.
I took a trip to one of my favorite building toy stores (which is now closed due to the lockdown). It is a building supply house where I purchased some bearings with mounting holes and some pulleys, nuts and bolts, etc. If I remember right that all ran about $40-$50 dollars.
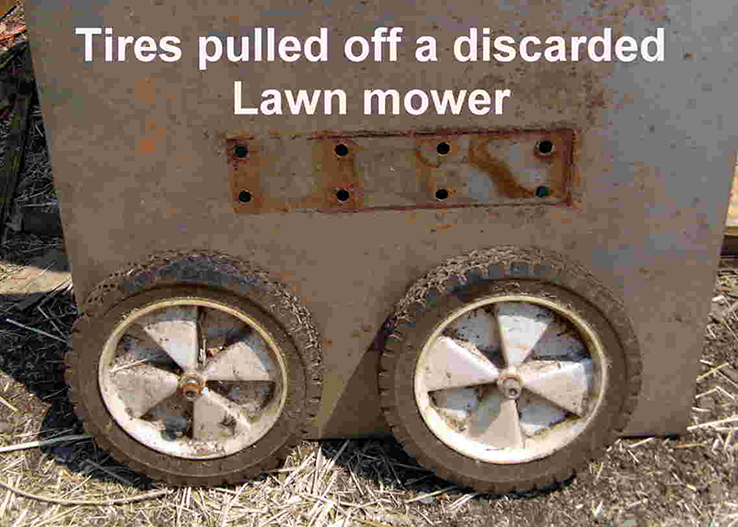
You can see from the pictures how I went about welding things up. However, you can use any method you want to mount things. The wheels I salvaged off a debunked lawn mower, something I have never use in over 40 years. Thanks to whomever dropped it off at the bottom of my property. The pulley in this picture is not the one I ended up using. This is a 10" pulley and spun the disc too fast and really tore up the bird. I replace it later with a 14" pulley which works just right. The pulley I picked up from Home Depot from the swamp cooler department.
The motor you see in the bottom picture is a 1/3hp motor I ordered off Ebay. Big mistake, it didn't have enough power for large roosters. I drove down the hill to Harbor Freight and invested in a 1hp motor as seen in the top photo. It was a little pricey hitting over $160 plus tax. However, the motor has no problem spinning any size bird.
I couldn't get any information on the hole needed to flush out the feathers. I had the round plate inside about 6 inches from the base and cut a rectangular hole about 4 by 8 inches. As you can see from the pictures below, the aluminum plate is just at the top of the hole. Click on the image to get a better view. Amazingly enough, most of the feather will fly out on their own. A little application of a water hose gets the remaining feathers out.
Beyond that I found my assorted kitchen knives didn't work well on cleaning out the chicken. I went on line and order a thin razor-sharp knife made for butchering animals. The knife works really well and I am pleased with it. The same website had heat shrink bags of a couple different sizes. I ordered some but haven't had an opportunity to use them yet. Again, videos on Youtube show how to use them to freeze your chicken without freezer burns. They also had labels with lines for putting some information, like the date, etc.
If you have found the above information useful, please hit my contact form and just say thanks. I would appreciate the fact I was able to help someone.